"We ask ourselves, who am I to be brilliant, gorgeous, talented, and fabulous? Actually, who are you not to be? You are a child of God. Your playing small doesn’t serve the world. There’s nothing enlightened about shrinking so that other people won’t feel insecure around you. We are all meant to shine, as children do. We are born to make manifest the glory of God that is within us. It’s not just in some of us, it’s in everyone. And as we let our own light shine, we unconsciously give other people permission to do the same. As we are liberated from our own fear, our presence automatically liberates others.”
Marianne Williamson

Wednesday, February 27, 2013

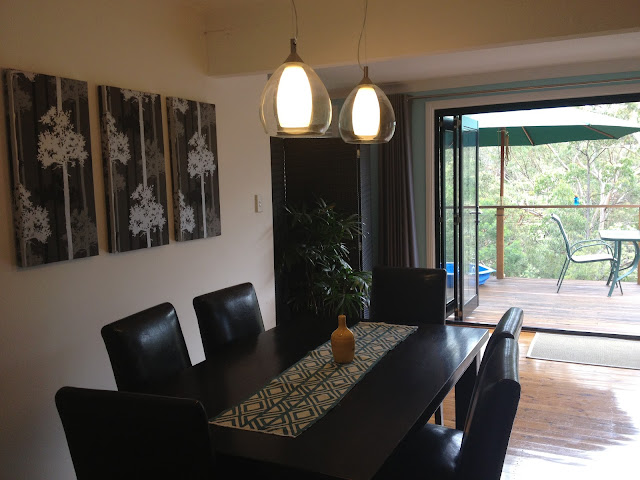
Dining Room progress

Our dining room is coming along nicely. Do you like our new lights? I love, love, love them. Simple and elegant- Love them. 

I found them on sale at Harvey Norman Lighting. My husband accidentally smashed one (with his head) while he was putting it up and the lovely people at the shop replaced the outer glass for just $10! How kind! They will definitely have our business again.


We still need to paint this whole area. We have been putting it off since we moved in because there is not a clear place to stop. If we start this section of the house, we will just have to keep going and going and it will take forever! I haven't found just the right colour either. We're thinking a light warm gray. Not sure yet.


 In other news, I spent hours last night trying to get that 'Pin It' button on my blog. It finally worked so anyone can now pin my pics to Pinterest using the button.You can find it at the end of each post. While I was fighting with the blog layout, my header shrunk and I can't for the life of me fix it back to how it was. Oh well, it will have to do for now.


Wednesday, February 20, 2013

...And the Fairy Cake


This was a cracker of a cake to make! I loved every minute! Gabby's request was for a fairy cake and we looked at pictures on the internet until she found one she liked.

Then I googled 'how to make a princess cake' and came across this amazing video on you tube. I learnt so many tips from this video that I will use for ever and ever.


 1. Use a piece of baking paper to make butter cream icing super smooth. I used a layer of butter cream under the fondant and it was perfectly neat. I wish I had taken a photo at this point, but I was too 'in the zone' to stop!

2. If you slap on a really thin layer of butter cream icing, then put the cake in the fridge for a while before applying a thicker coat, you don't get cake crumbs in the icing. Who knew this little beauty and didn't tell me?! I've always had difficulties with crumbs in my icing.

3. To make cute little flowers cut a small circle using your piping tip. Then hold the centre still (I used a skewer) while you indent towards the centre of the circle using the back of a knife

Check out the video for more excellent tips!


Gabby loved it and it was yum!

Here she is with her big brothers. Love these three- They make me happy!


Thanks for popping by!


Tuesday, February 19, 2013

A birthday dress for Gabriella Rose

My girl turned 4 yesterday.

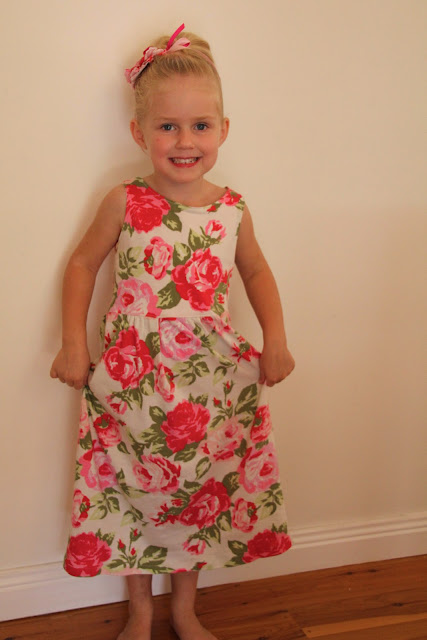
This is the dress I made for her to wear at her party.


So the obsession with jersey fabric continues. This fabric is from a shop called 'Oh Sew Crafty' based in the U.K. The shipping was really fast and reasonably priced. I love this fabric! So, so pretty and girly.


Once again, I traced around one of Gabby's favourite dresses to make the pattern. She asked for it to be 'really long'.

Love this girl.


Tuesday, February 12, 2013

Valentines gift for him

What on earth do you buy/ make for your man on Valentines Day?! Socks? Undies? Beer?

My man is a super humongous blessing in my life so I wanted to make something special, but not cheesy for him. (Is it cheesy? I'm not sure. Maybe just a little!) We are very into doing 'housey stuff' at the moment so I thought something for the wall would be good. I saw a similar idea to this on etsy, but the maps were cut into love heart shapes and the style seemed a bit girly/ country to me. So I printed 6 maps straight from Google Maps of special places including where he proposed, where we got married, our honeymoon, our first home, where our babies were born and our current home.


I wanted a proper photo mat cut to give it a professional look so I jumped online and found a 'collage creator' HERE where you can create your own photo mat in whatever colour/ shape you like. You can also choose from hundreds of different frames. I chose a cheap white one. I was super impressed with this company! This idea only came to me really late on Sunday night and the frame arrived first thing this morning (Tuesday)! So fast, and the frame and mat are better quality than I had imagined!


I used a silver pen to write on the photo mat underneath each map giving it a more personalised look. I did my best to copy my favourite font called 'Pupcat'. You can get it free online.


I love the abstract, funky look of framed maps and the colours tie in well with our decor. The Google maps are not the best quality and I would have loved to cut up a real street directory, but I couldn't find a suitable map for our honeymoon in Bali and I couldn't leave that out.


I'd love to see everyone else's ideas for Valentines Day. Feel free to post a link to your amazing ideas! If not, you still have time to have a go at this one. Go on!!


Thanks for reading!


Saturday, February 2, 2013

Spotty jersey dress

My blogging has finally slowed down as it was back to my 'real job' last week. I thought I'd try to make a few dresses that I could wear to work. Here is one I made on a rainy old afternoon-

(My son took these photos and I am holding that yellow belt in place as it is too big- Not the best, I know!)

I added wider straps to this one- more 'teacher suitable' I think!  This little number looks pretty with red, yellow and turquoise accessories (not all at once!) so I think it will be quite versatile. The fabric was from this cool ebay shop in the UK. I thought the postage was reasonable and it arrived really quickly.

My next challenge will be to make a dress with cap sleeves. I don't know how to do sleeves and the pattern I have has really limited instructions so I'll see how I go. If anyone knows of a good tutorial for adding sleeves I'd love to take a peek!

It's another rainy day today. Let's see what fun the kids and I can get up to before they are back to school in Monday.

Thanks for reading!